
Automate your gift delivery process so gifts invitations land right on time for birthdays, work anniversaries, or welcoming new starters. Here’s how to set up scheduled deliveries for your recipients.
Step 1: Select an event date for your gifting campaign. Choose the date that matches your special event, like a birthday or work start date.
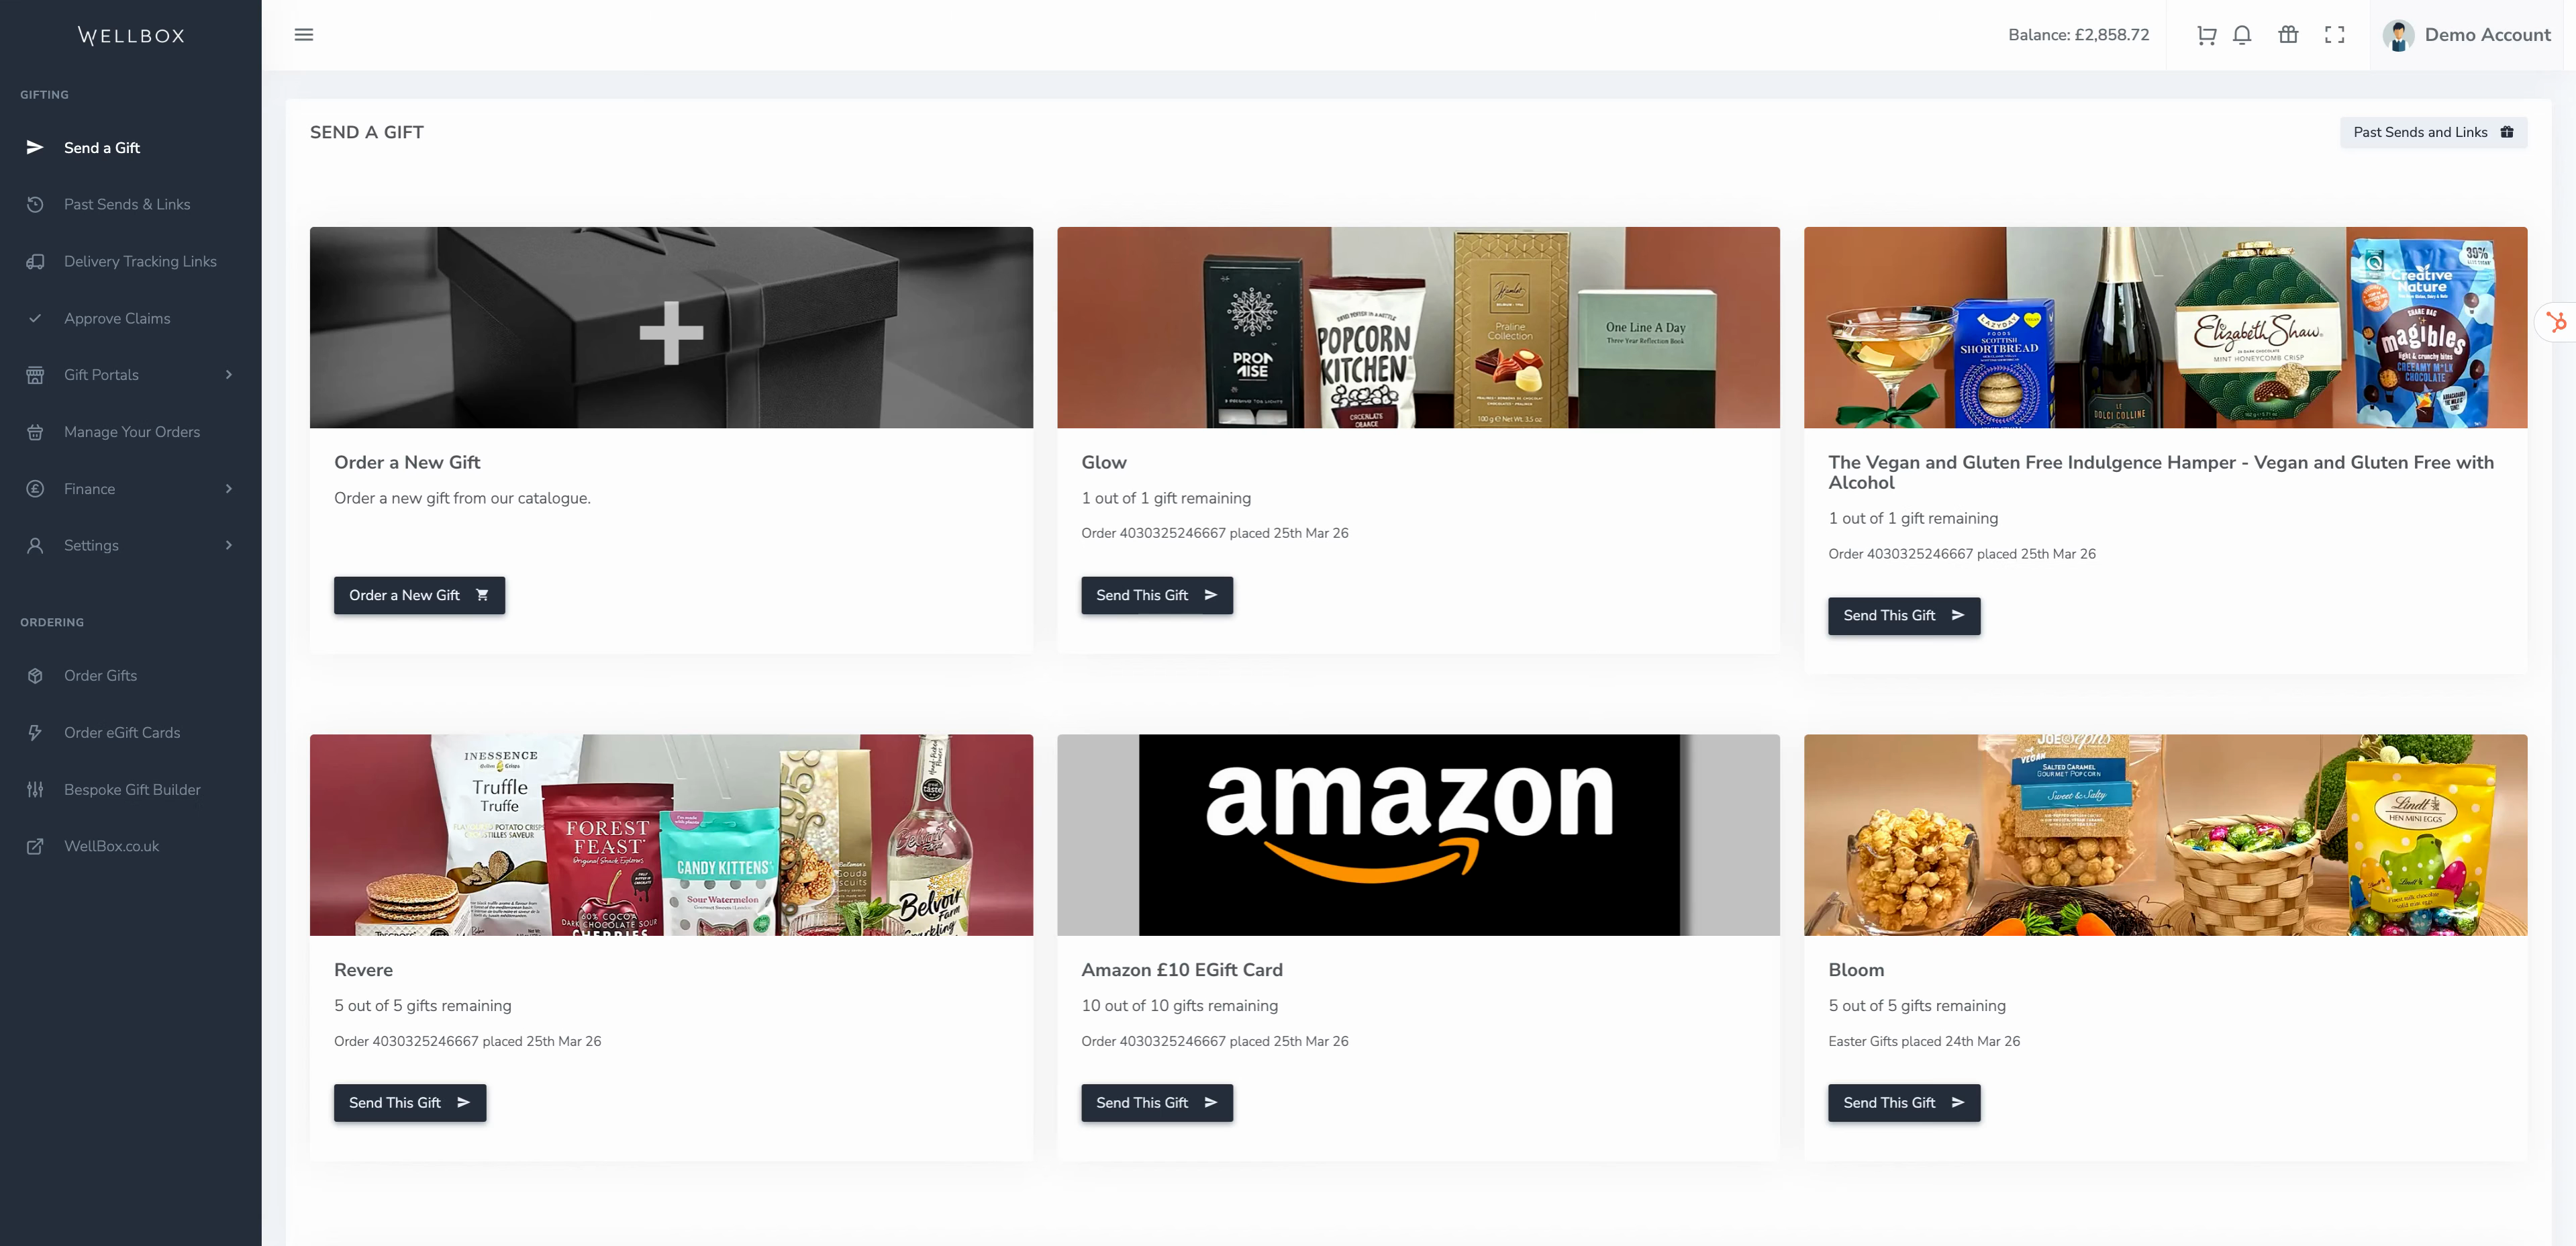
Step 2: Pick the gift you’d like to send. This could be a physical gift or an e-gift card.
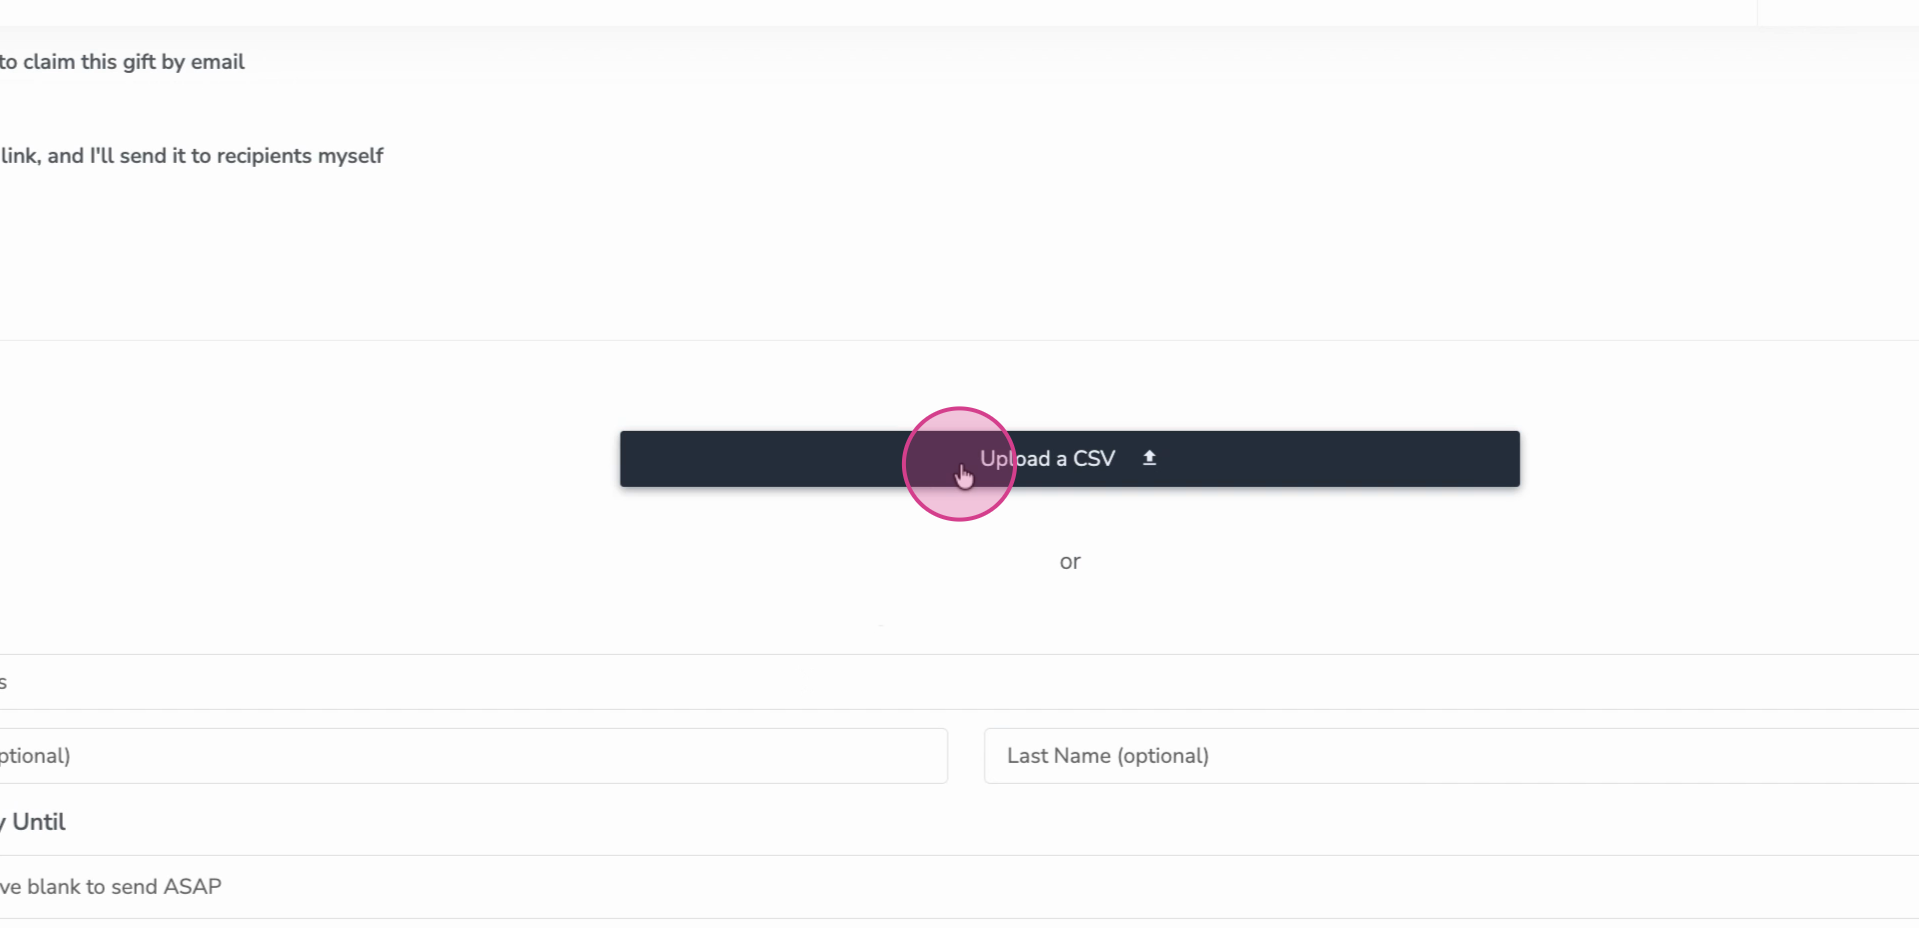
Step 3: Choose Send link by email. You can add recipients one by one or upload them in bulk.
Step 4: If uploading, click Upload CSV.
Step 5: Select your prepared recipient file. You can make one easily in Google Sheets or similar, then save it as a CSV.
Step 6: Use a clear date format—UK date (DD/MM/YYYY) is recommended to avoid confusion.
Step 7: Save your spreadsheet as a CSV before uploading.
Step 8: The system automatically matches your file’s columns to its fields. Check and confirm the mapping.
Step 9: Click Process uploaded file to review your recipients and their event dates.
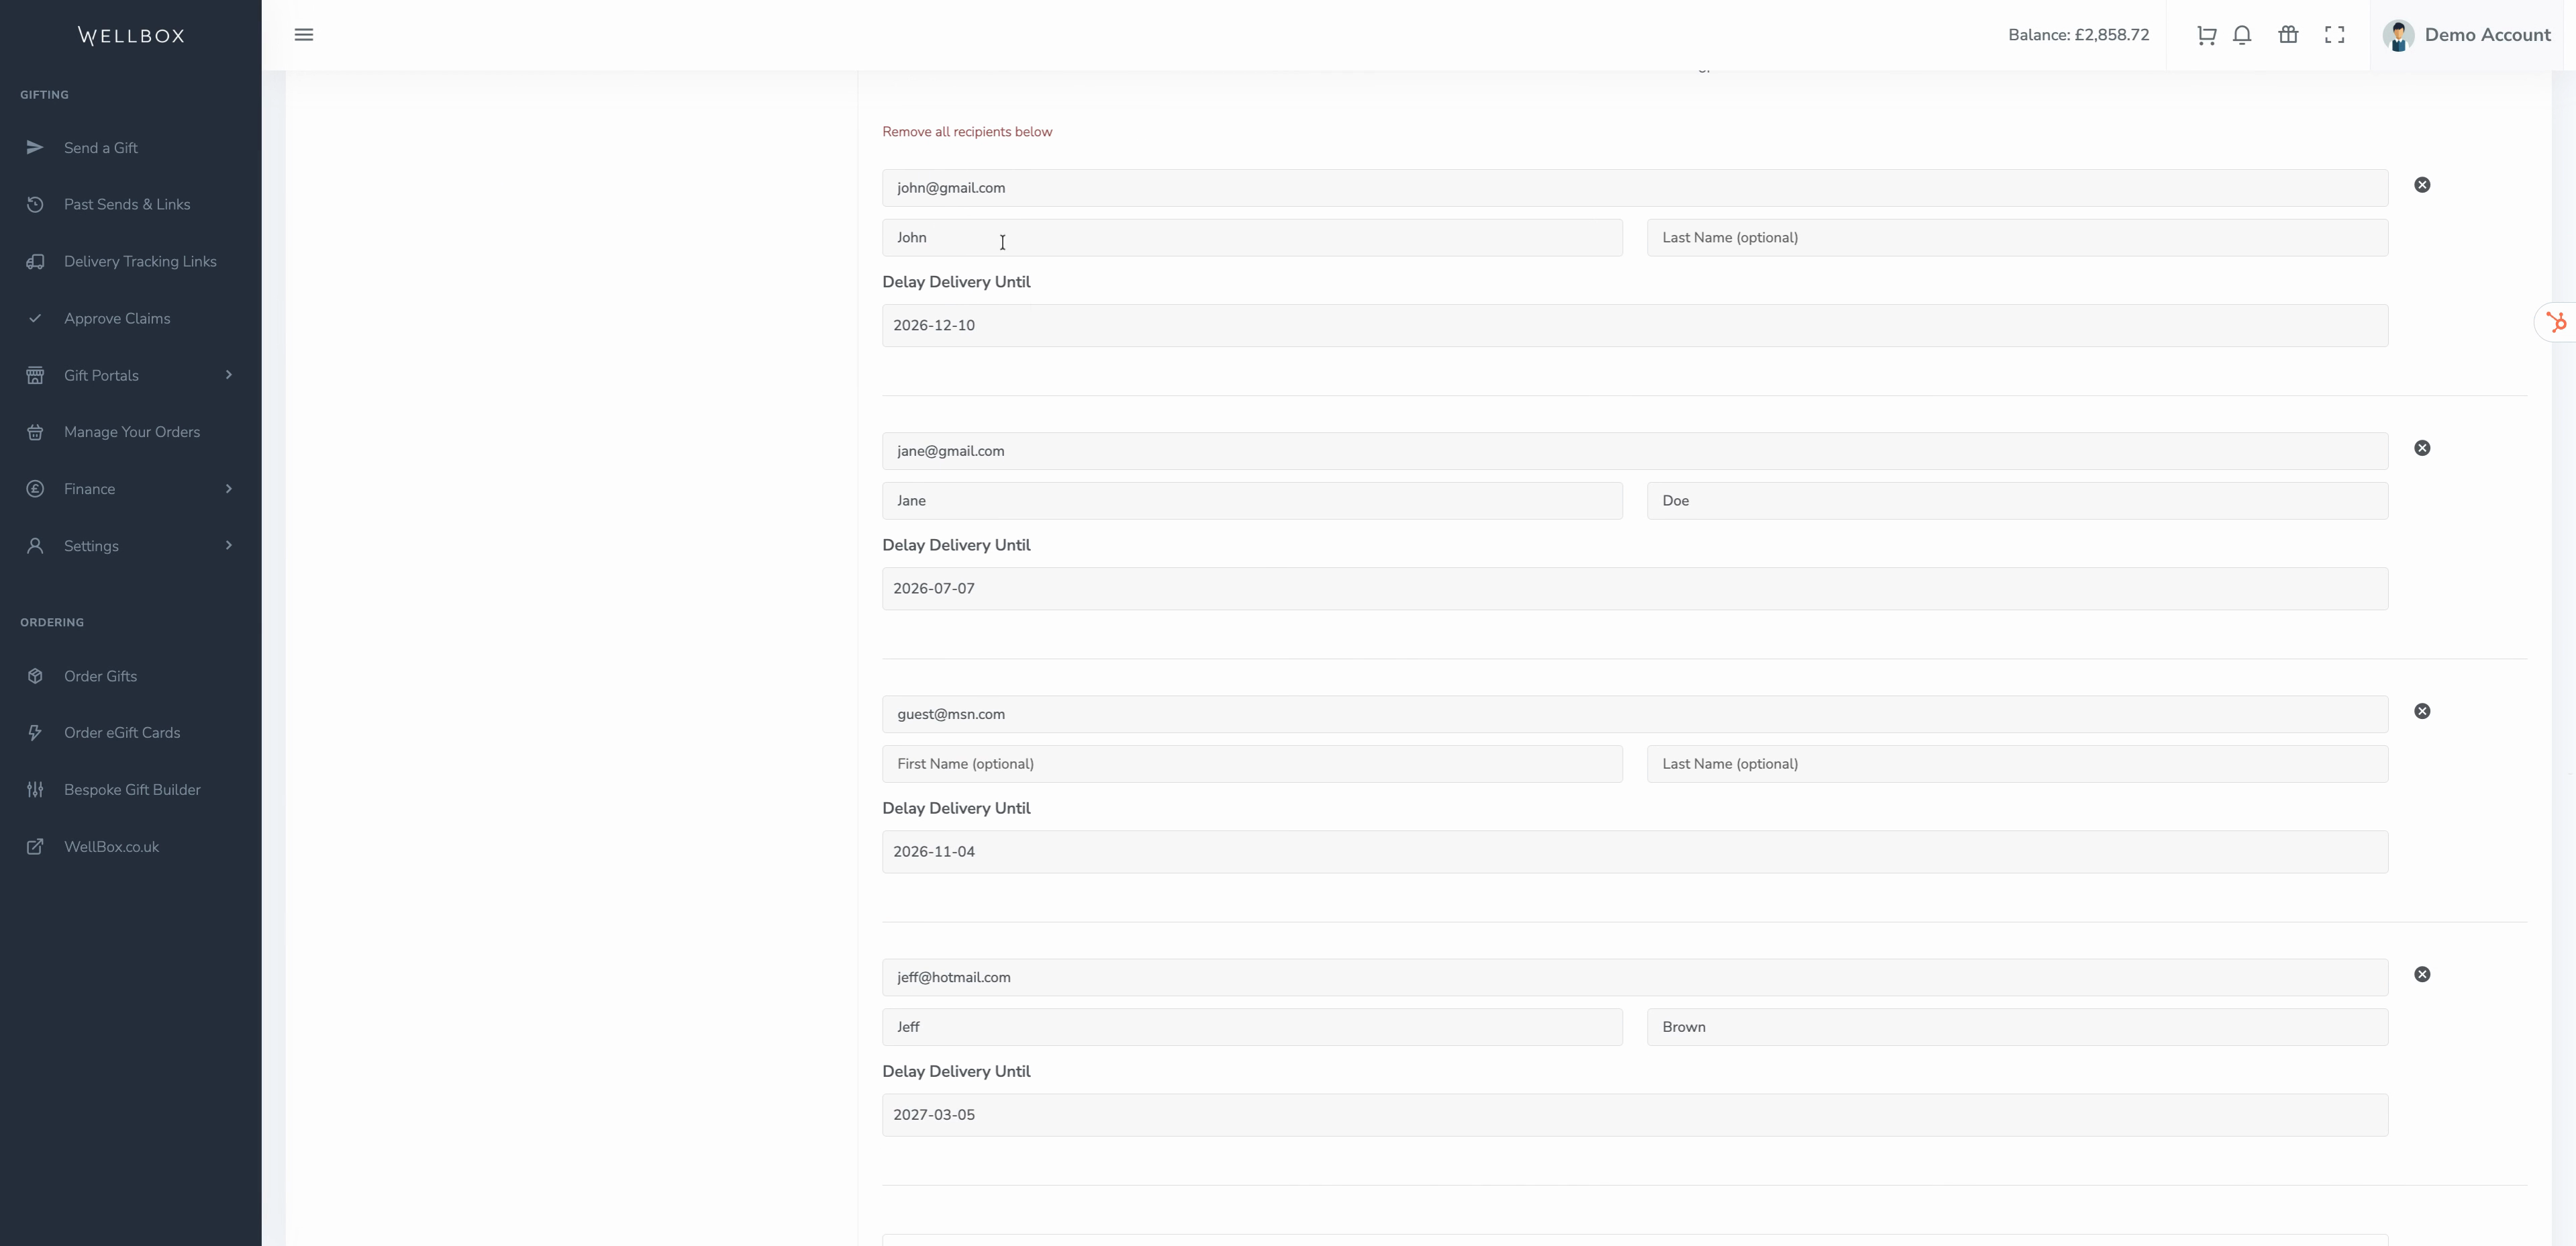
Step 10: Any past-dated birthdays or anniversaries will be automatically shifted to the next year.
Step 11: Optional: Add an e-card or message for your recipients.
Step 12: Set the Email delivery date. Choose whether the email should be sent on the event date, a number of days before, or as soon as possible.
Step 13: If you pick asap, the event date will be ignored. To schedule for the event, select the right timing.
Step 14: Click Preview Email and Send to review your settings.
Step 15: Click Send Gift Redemption Emails to confirm your order. You'll get a confirmation showing when the emails will go out.